
Change or remove lots of shifts at once
Select shifts on the roster, then change their times, people, positions, breaks or dates together, swap two shifts, publish them, or delete them in one go.
When a change applies to more than one shift, such as a later start for the whole weekend or a new person for a run of shifts, you don't need to open each one. Select the shifts, then change, publish or delete them together.
Who this is for
Owners and managers using the Shiftly web platform to run your business.
Before you start
- You're an owner or a manager who can edit the roster at the location you're working on.
- Open Roster from the main navigation and pick the location at the top left.
- Shifts that have finished, and shifts someone is clocked in to, can't be selected. To change what was worked, edit the timesheet instead. See Fix times, breaks and pay on a timesheet.
Select the shifts
Turn on bulk edit
Open Roster settings (the ⋮ button next to Publish) and choose Bulk edit. It's greyed out when the roster has no shifts.
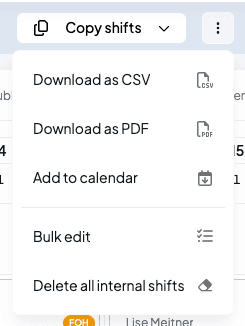
To pick one shift without turning bulk edit on, hold Alt (Option on a Mac) and click it.
Click the shifts you want
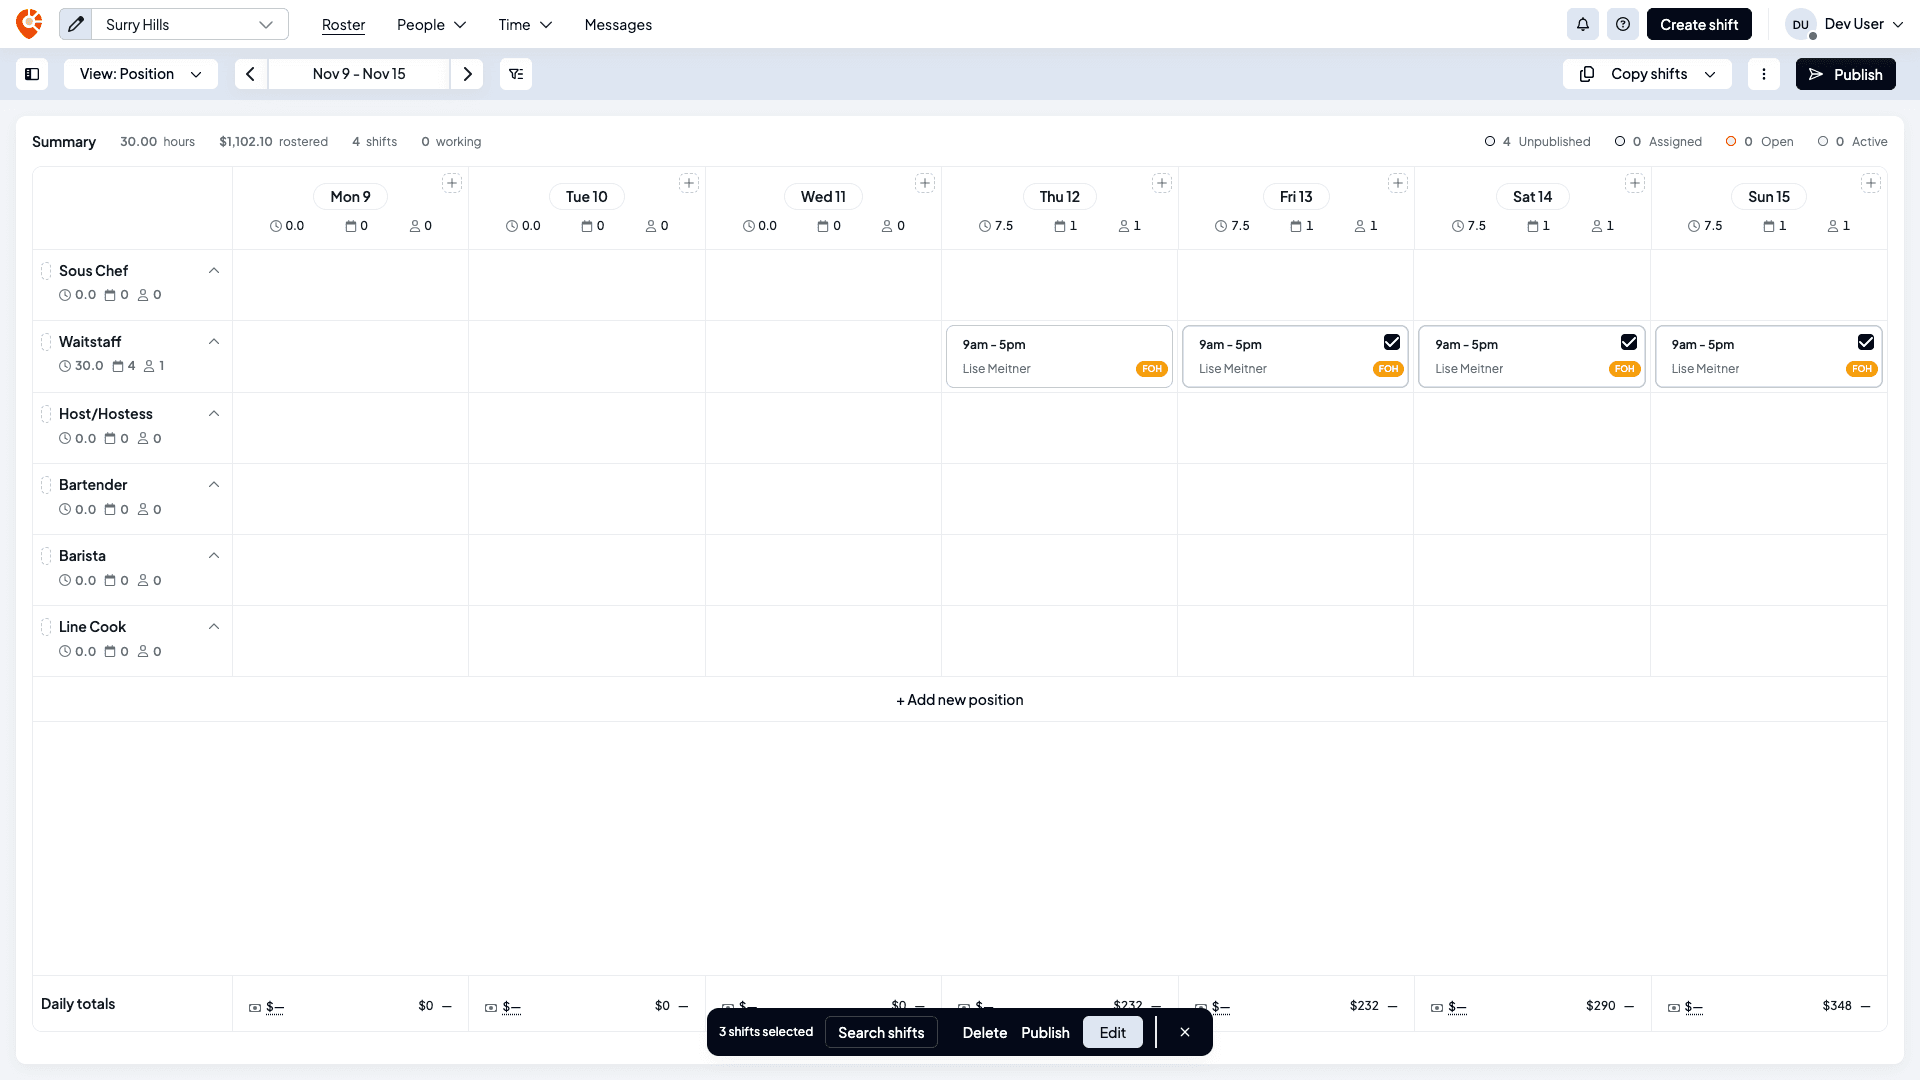
In bulk edit, clicking a card selects it instead of opening it, and a tick shows in its corner. Click it again to leave it out.
A bar at the bottom counts what you've picked, for example 3 shifts selected, with Search shifts, Delete, Publish and Edit. The × at its end, Exit bulk edit, clears the selection and turns bulk edit off.
Your selection stays when you change week, day or filters. The bar then reads, for example, 5 shifts selected, 3 not on screen, and Edit, Delete and Publish act on every selected shift, including the ones not on screen. Switching location, including to or from All locations, clears the selection, and so does leaving the roster.
Or search for them
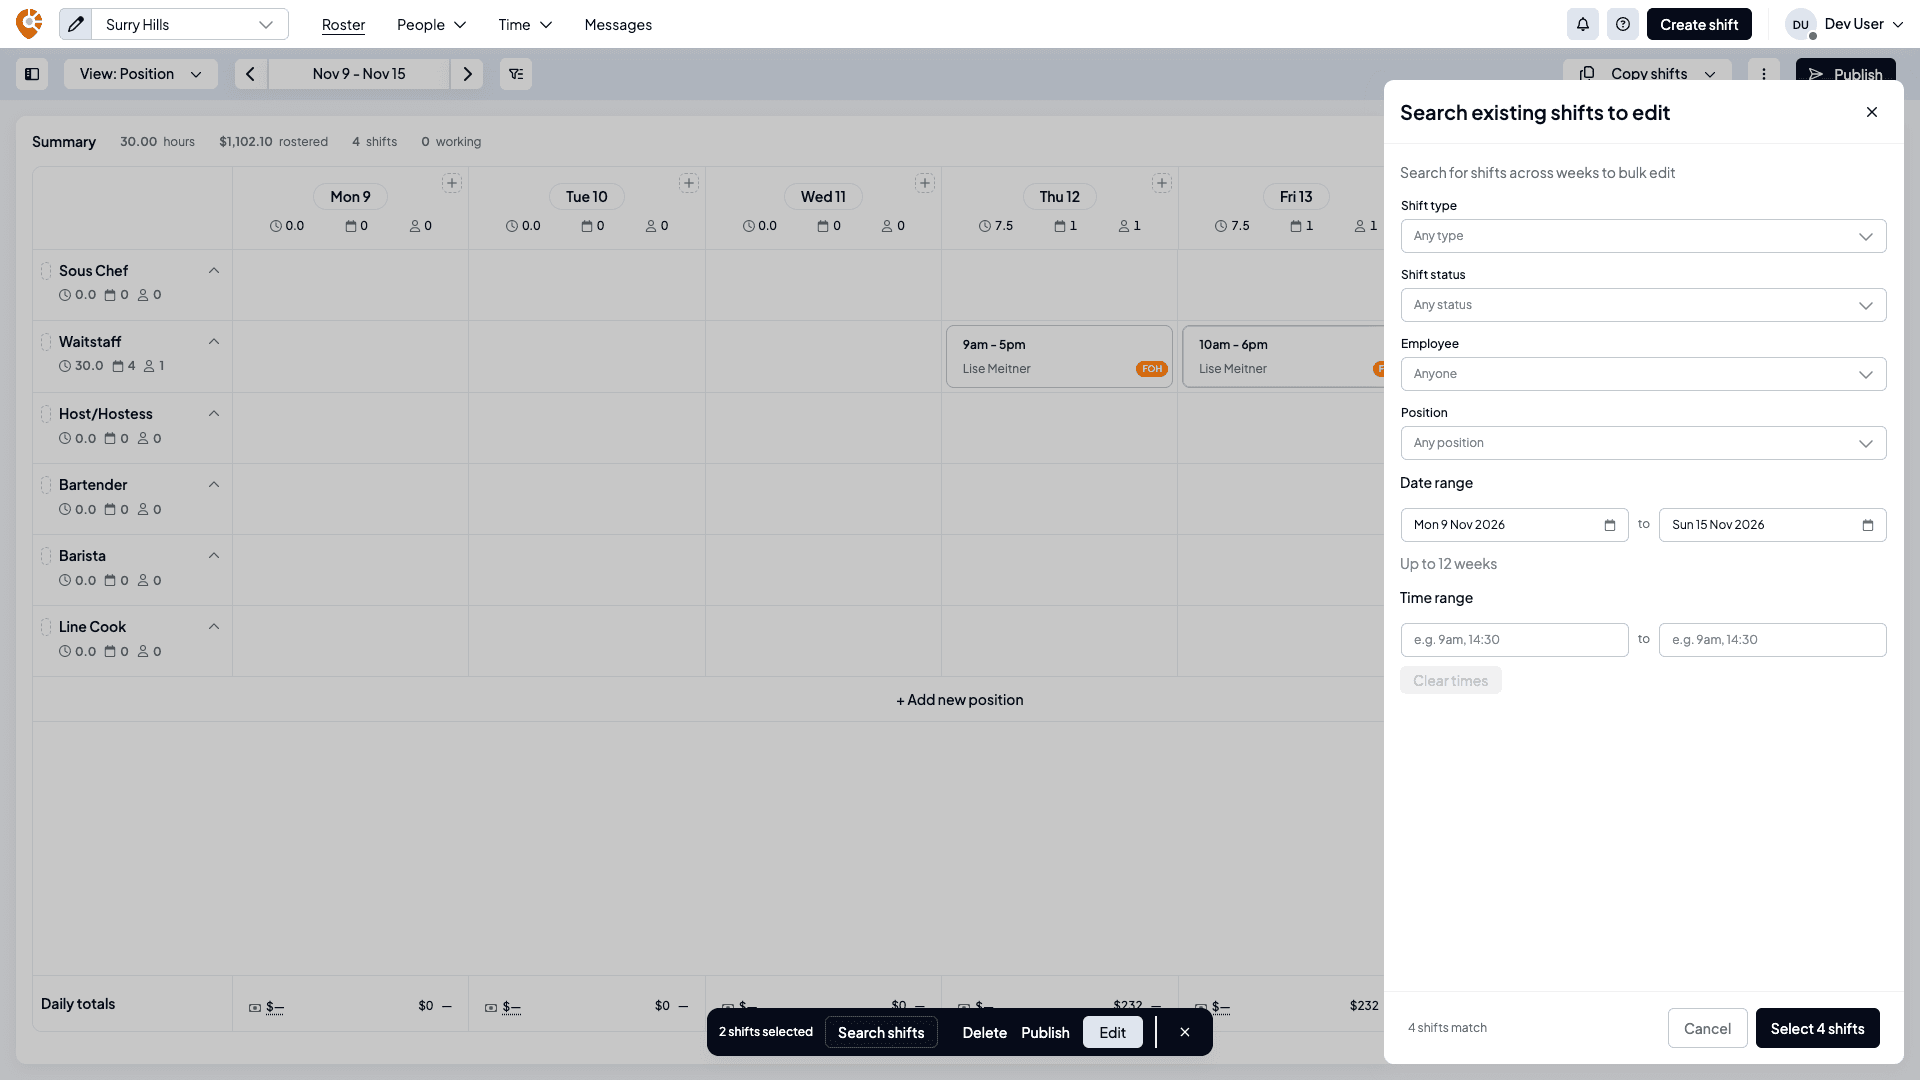
To pick shifts across several weeks, select Search shifts in the bar. Search existing shifts to edit lets you narrow by Shift type, Shift status, Employee and Position, a Date range of up to 12 weeks (it starts on the week on screen) and an optional Time range.
The bottom of the panel counts the matches, such as 4 shifts match, and tells you when some have finished and are left out. Select Select 4 shifts to make those your selection. It replaces whatever you'd picked by hand.
Change the selected shifts
Choose what to change
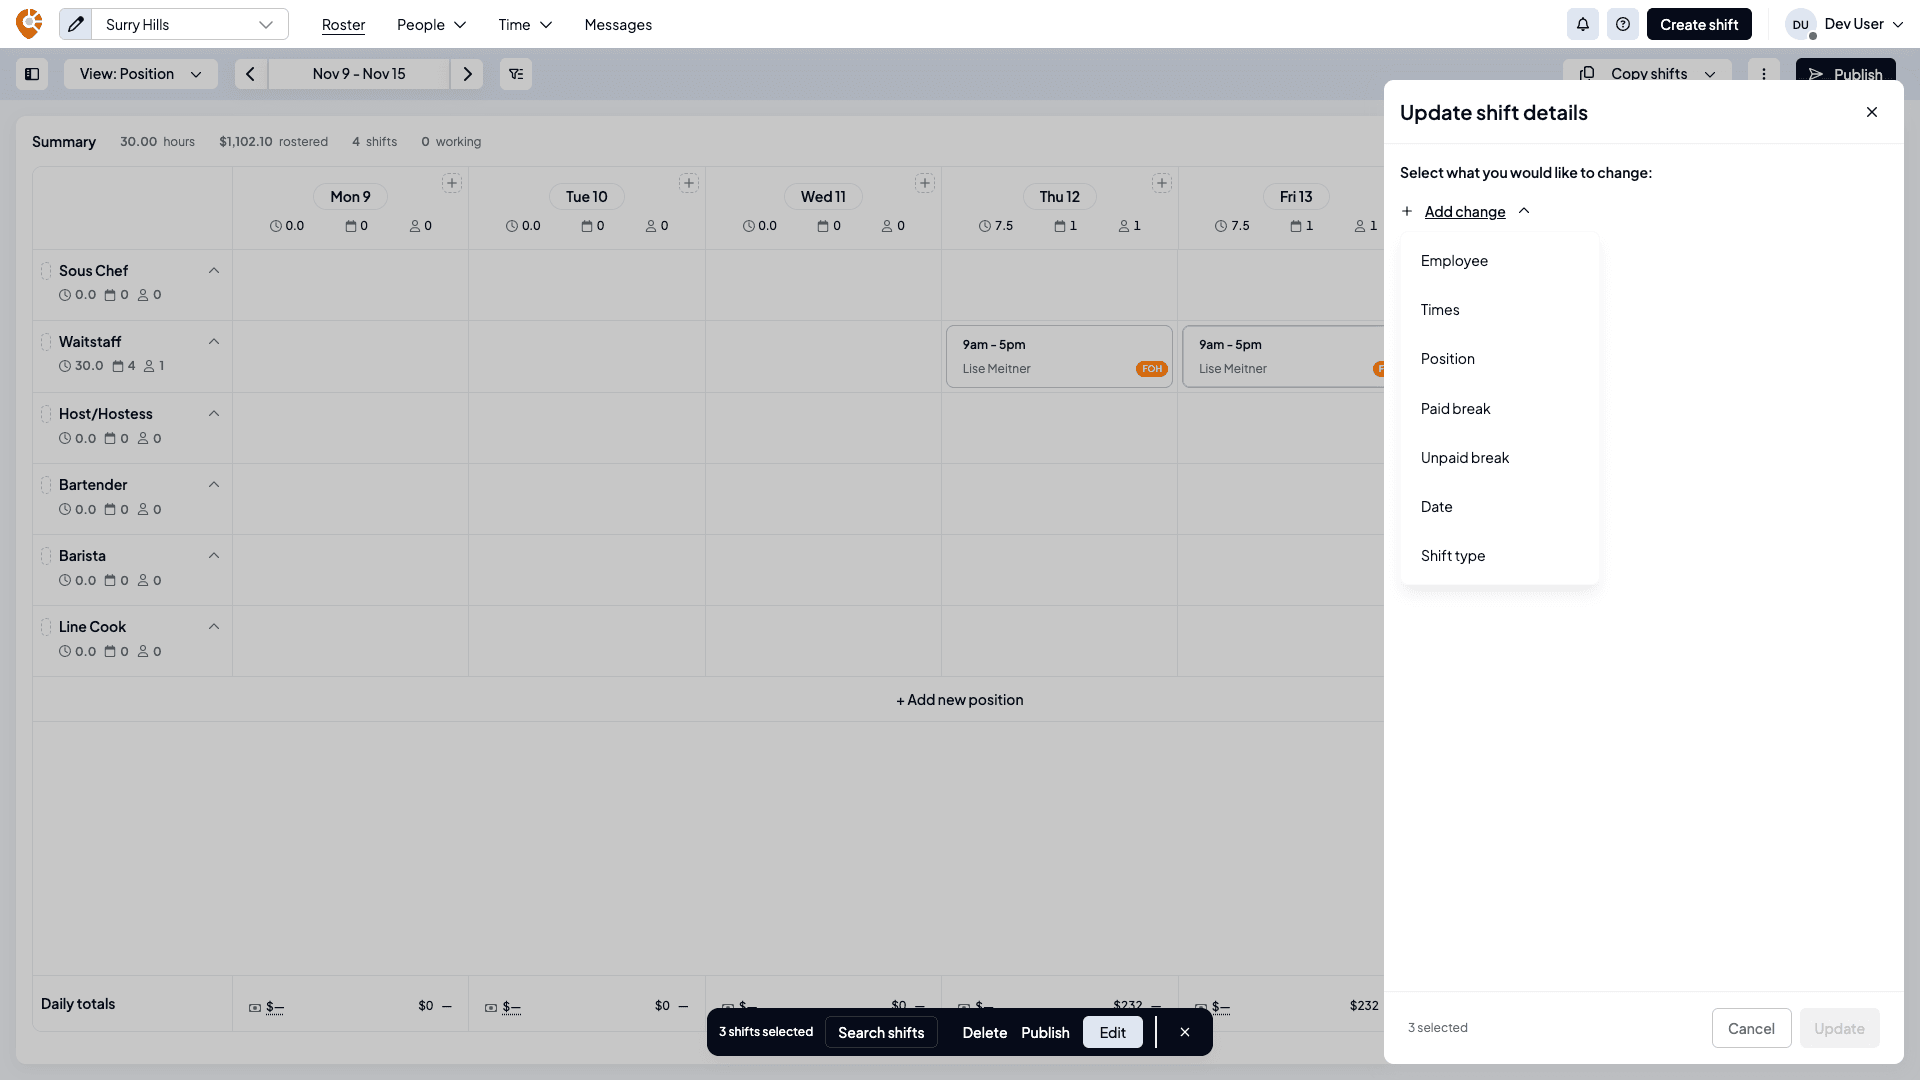
Select Edit in the bar. Update shift details opens with Select what you would like to change:. Select Add change and pick a field. Add as many as you need:
- Employee: the person to put on every selected shift.
- Times: a new start and finish time for every shift. Each keeps its own day.
- Position: the role to move them all to.
- Paid break and Unpaid break: one break of that length (15, 30, 45 or 60 minutes) in place of any breaks of that kind. None removes them.
- Date: moves every selected shift to that date, keeping its times.
- Shift type: Empty or Open, which takes the person off every shift. You can't change Employee and Shift type together.
Fill it in and update
Fill in each change. The × beside a change removes it. Update stays greyed out (Fill in every change first) until every change you added has a value.
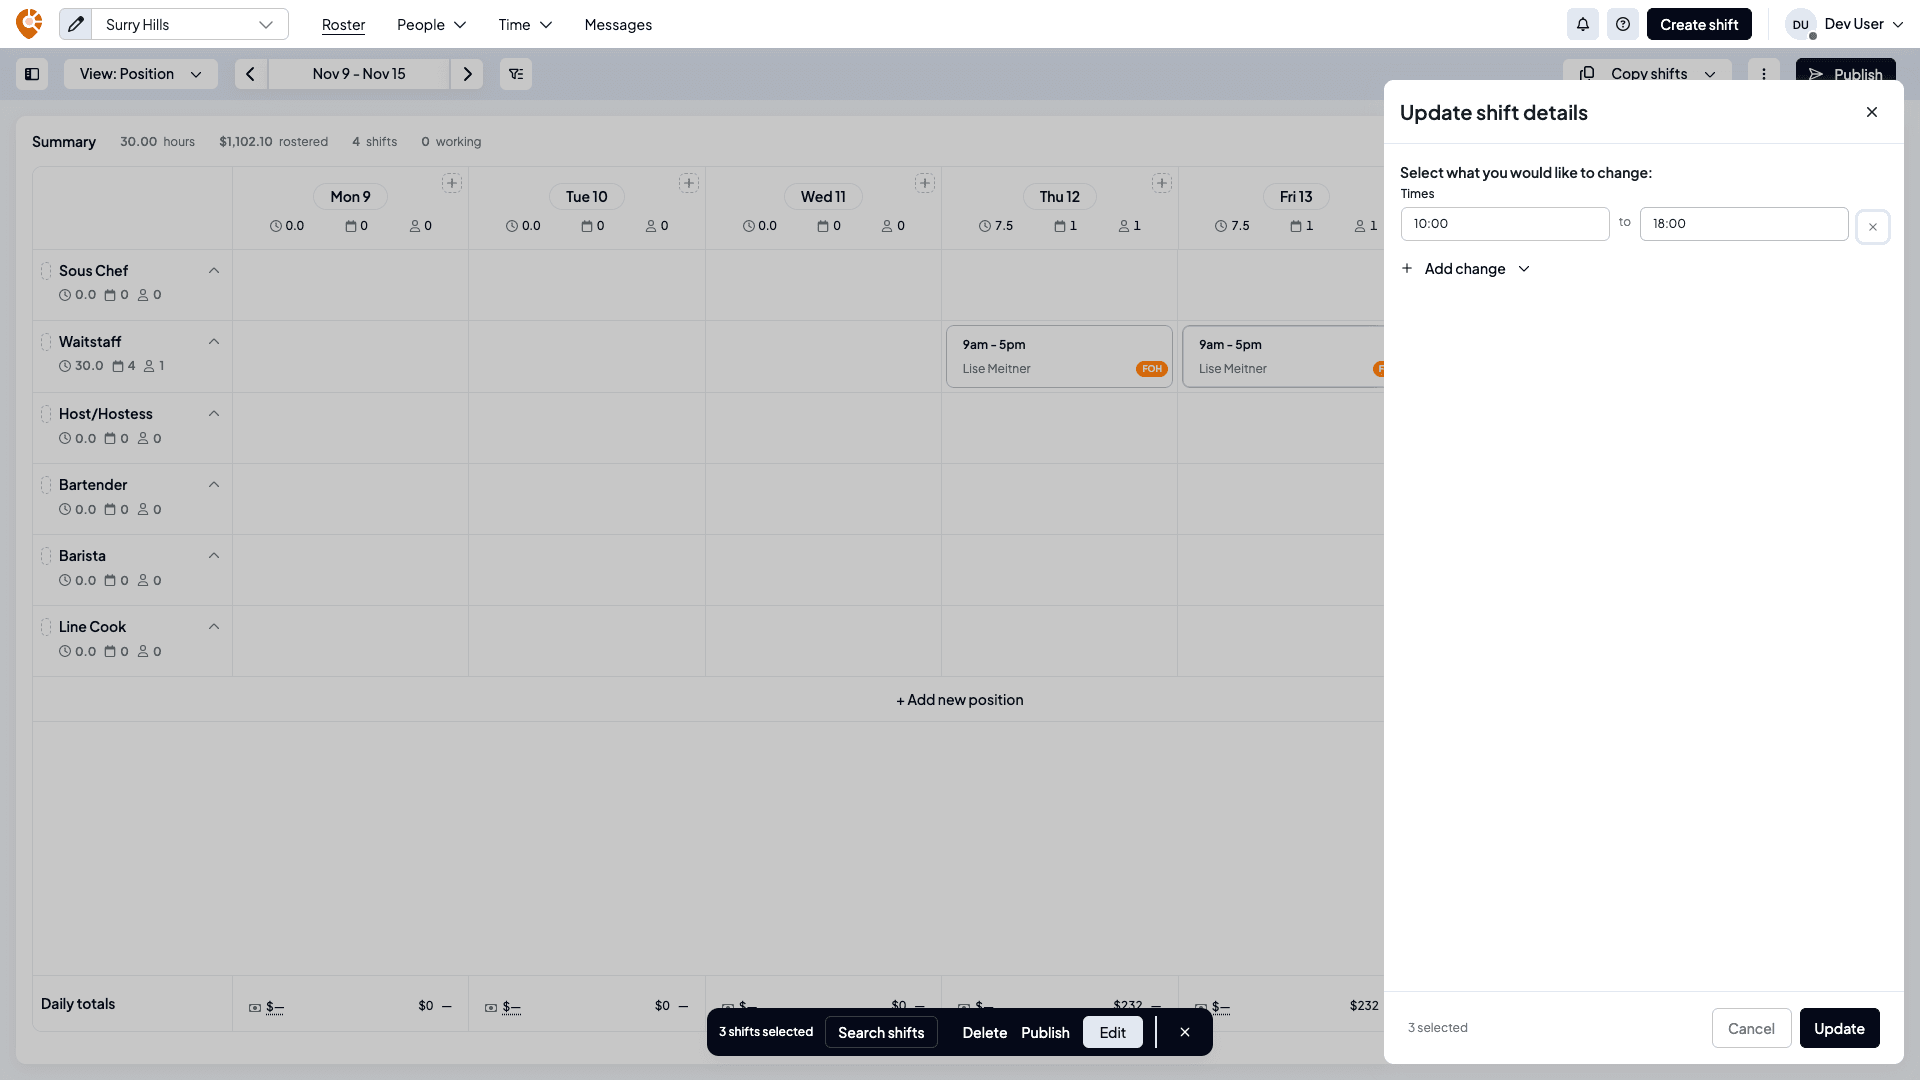
Select Update.
Check what changed
Applied changes lists each shift with its change, such as the old times struck through beside the new ones, and a status: Updated, or Failed with the reason. Each shift is updated on its own, so one that can't change won't stop the others. The bottom counts the result, for example 3 updated, 0 skipped. Select Done.
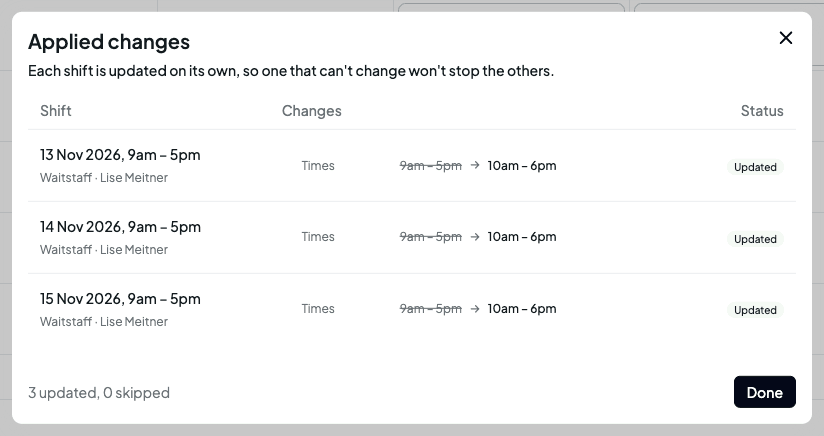
A shift fails if the change would clash with another shift that person has or with their approved leave, the same checks as editing one shift. A shift that finished in the meantime fails with This shift has finished, so it can't be changed. To change what was worked, edit the timesheet.
Changing a published shift turns it back into an unpublished draft, so staff keep seeing the old details until you publish again. See Publish your roster.
Swap two shifts
With exactly two shifts selected, right-click one of them. The menu offers:
- Edit shifts: opens Update shift details for both.
- Swap employee: the two people trade shifts.
- Swap positions: the two shifts trade roles.
- Swap times: the two shifts trade start and finish times.
- Delete shifts.
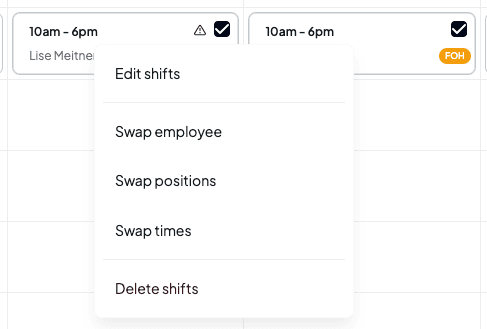
The swap options need exactly two shifts (Select exactly two shifts), and a shift someone is clocked in to, or one that has finished, can't be swapped. Both swapped shifts become unpublished drafts.
Publish the selected shifts
Select Publish in the bar to publish only the selected shifts. It's greyed out when none of them needs publishing, with the reason when you hover it: Select an unpublished shift first, or Empty shifts can't be published. Assign someone or change them to Open. See Publish your roster.
Delete the selected shifts
Choose Delete
Select Delete in the bar, or right-click one of several selected shifts and choose Delete shifts. You can also drag a single shift onto the bin that appears at the bottom right of the roster while you drag.
Confirm
The window, for example Delete 3 shifts, lists each shift and reminds you that Deleting removes the shift from the roster. Published shifts disappear for the staff who could see them. When the shifts come from more than one location, each row names its location. Select Delete shifts.
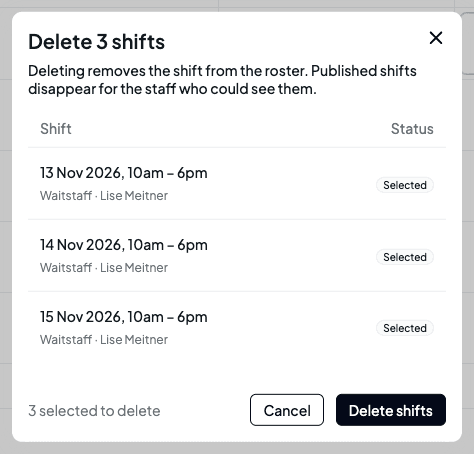
Some shifts stay on the roster and are marked in the list: one whose employee is Clocked in, one that has Finished, and, for managers whose access is limited to some tags, one Outside your tags. The window says why, for example 1 shift stays because its employee is clocked in. If none of them can be deleted, Delete shifts is greyed out. If Shiftly can't delete the shifts, your selection is kept so you can try again.
Clear a whole week or day
Roster settings also has Delete all internal shifts, which deletes every shift on the week (or, on the daily roster, the day) you're looking at. Delete shifts asks you to confirm first, for example Are you sure you'd like to delete 47 shifts? Select Delete.
Related
Find your way around the roster
Read the roster, change one shift in place, and assign from the panel.
Create and edit shifts
Add a shift, set its details, and edit or delete it on its own.
Copy and repeat shifts
Copy a whole week, or copy, paste and repeat one shift.
Publish your roster
Send your changes to the team.
Copy and repeat shifts
Copy a whole week of shifts, copy and paste one shift, repeat it across the week, copy it as you drag, stack a second shift in a cell, and turn a shift into a timesheet.
Add a note to a roster day
Leave a note on a day of the roster, such as a booking, a delivery or a staffing reminder, for the other managers at that location.